


Easter and Spring Table Decor
Whether you need a quick decoration idea for Easter or something pretty to display for spring, these DIY projects are easy enough for crafters of all skill levels, and they're very versatile!
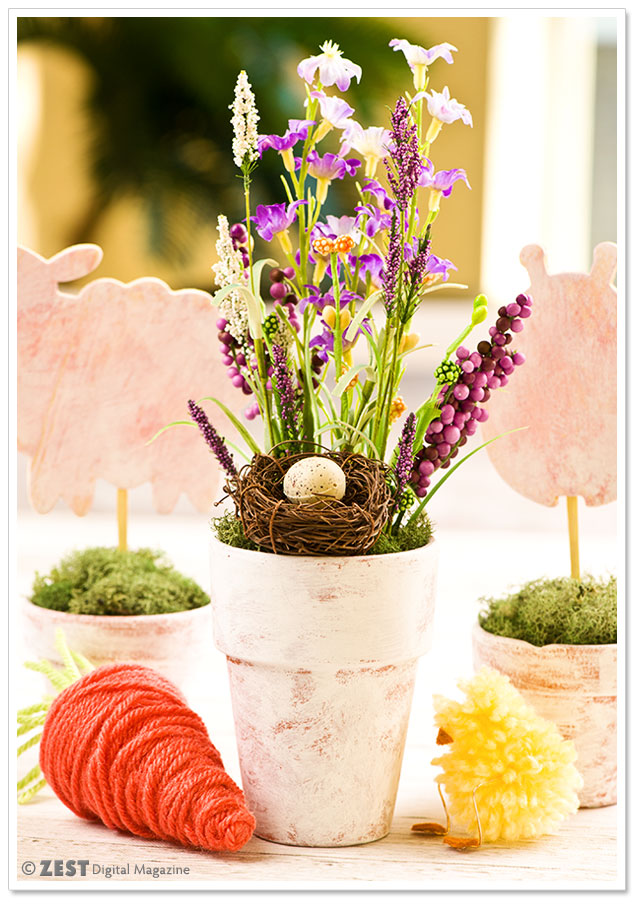
Whitewashed Flower Pots
What you'll need ~
- Small terra cotta pots, various sizes
- White acrylic paint
- Paint brush
- Floral foam
- Reindeer moss
- Silk spring flowers and decorative picks
1. Dip a dry paint brush in the white acrylic paint and wipe most of it off on a paper towel. Dry brush on the terra cotta pots with short strokes and dabbing motions. If the paint is going on too thick, quickly wipe it off with a clean paper towel before it dries. Stop when you've achieved the amount of coverage you like.
2. Once the pots are dry (about 10 minutes), cut a piece of floral foam to fit inside each pot. Arrange the silk flowers and decorative picks to your taste.
3. Cover the top of the floral foam with the reindeer moss until you can no longer see it.
Note: You can make your own decorative picks with unpainted plywood shapes from the craft store. I made a ladybug, a picket fence and a lamb. Paint them as you please - I applied the same whitewash technique used on the pots. I just added some dabs of pink paint, as well. Then, simply hot glue the shapes to 3-1/2" wooden craft picks.
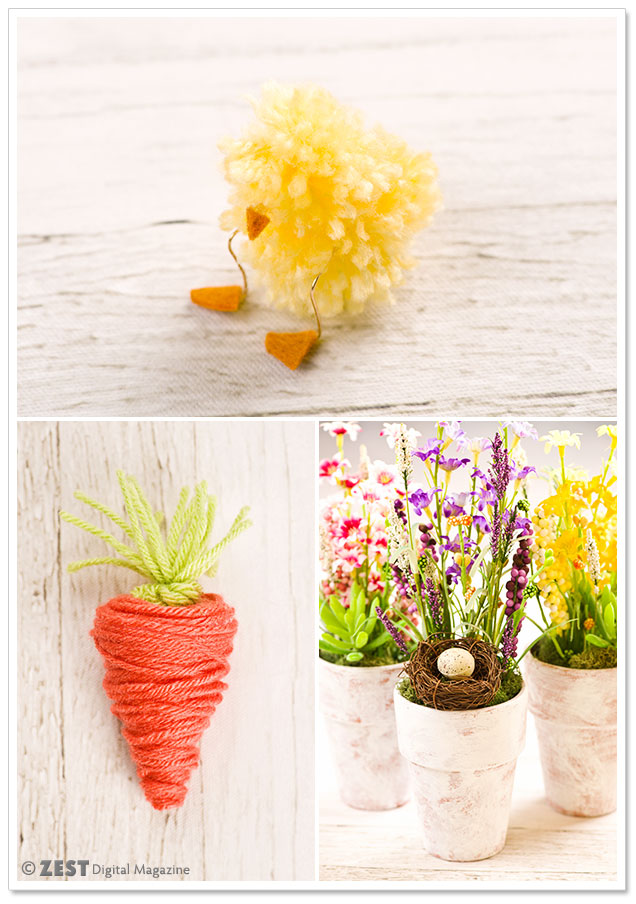
Pom Pom Chick
What you'll need ~
- Yellow yarn (I used Sunshine by Lion Yarn)
- Forks (A salad fork and serving fork work well)
- Scissors
- 4" 20 gauge gold tone jewelry wire
- Orange felt
- Craft glue or hot glue gun
1. Start by making the pom pom for the chick's body. Cut a short piece of yarn (about 4") and set it aside. Wrap your yellow yarn around the larger of your forks about 40 times. Trim the end of the yarn, being careful not to let your yarn unravel. Take the short piece of yarn and tie it tightly around the middle of the loops (you can slip the yarn through the middle tines of the fork to do this). Double knot it, just to be safe. With sharp scissors, cut through the loops on each side. Fluff out your pom pom and trim any pieces that are too long.
2. Repeat the same process for the head of the chick, this time wrapping the yarn about 20 times around a salad fork.
3. Cut a small triangle from the orange felt for the beak, and two rounded triangle shapes for the feet.
4. Glue the beak onto the chick's head, and then glue the head to the body.
5. Take your wire and bend it into a U-shape with your fingers. Thread it through the center of the body pom pom. Bend each side of the wire to form a "knee" and then again to form the "foot" - this part should be flat and parallel to the table. Adjust the wires until the legs allow the chick to stand up without toppling over.
6. Glue your orange felt feet to the wire.
Yarn Carrot
What you'll need ~
- Orange and green yarn (I used Goldfish and Sweet Pea by Lion Yarn)
- 3" styrofoam cone
- Scissors
- Craft glue or hot glue gun
1. Start by making the carrot greens - this is a pretty standard yarn tassel. Cut a short piece of yarn (about 4") and set aside. Wrap the yarn about 10 times around four fingers. Trim the end of the yarn, being careful not to unravel your loops. Carefully slide the yarn off your fingers and tie a tight knot a knot with the 4" piece, about 1/2" in from the end of one side of the loops. Double knot it. Cut through the loops on the other end (the side you didn't tie the knot on). Trim the yarn ends so they're more or less even.
2. To make the carrot, you'll be wrapping the styrofoam cone with the orange yarn. If you want a perfectly even look, you'll want to coil the yarn carefully. I went for a more organic look, which allowed me to wrap the yarn quickly. I found it's easier to start at the wider end of the cone and work down to the tip. It's also helpful to apply a dab of glue to the end of the yarn attaching it to the top of the cone. You can glue the yarn periodically as you wrap it to keep it from unraveling.
3. Once the carrot is done, just glue the greens on top!
--- This project was created by Erika Pitera, the managing editor and art director here at ZEST


Leave a comment