


Halloween Spider Stockings
I've never been one for dressing up in a full costume for Halloween, but I like to do something a little festive for the holiday. I received some samples of Simply Spray fabric paint and started thinking of ways I could use it for Halloween.
What I came up with is spooky spider stockings! With stencils and Simply Spray, you can transform an ordinary pair of stockings into a chic Halloween statement.
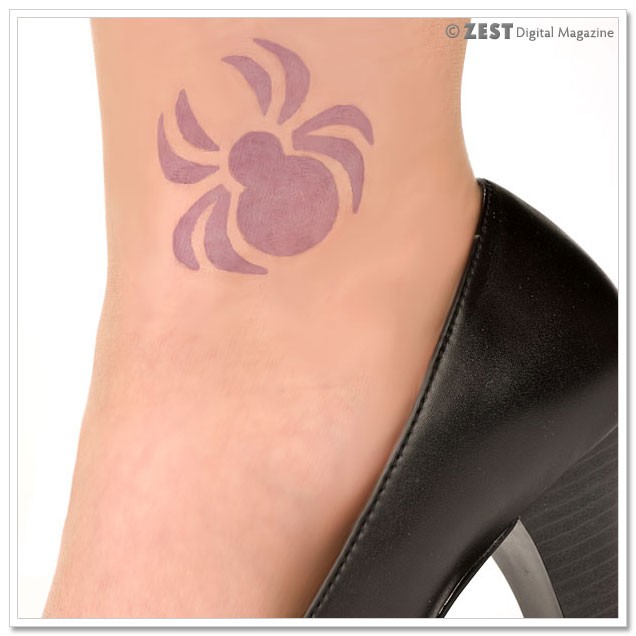
As you can see from the photo, I started with a spider near the ankle, but you can make the design as elaborate or as simple as you please. This concept can easily be transferred to socks - actually, to pretty much any piece of clothing you'd like!
Simply Spray fabric paints work on many materials, ranging from cotton to plastic to nylon, etc. You can find it at your local craft store in a variety of colors. Just check the uses on each variety of paint to see if it'll suit your needs.
For Halloween, both the Costume Fabric Paint and the Halloween Stencil Spray are non-toxic (so they're safe for children, too) and can be used to create homemade costumes, trick-or-treat bags and other decor.
Some of their ideas for Halloween include transforming white angel wings into pink fairy, black gothic or red devil wings; you can also turn tights, gloves and canvas shoes into accessories for superheroes, animals and cartoon characters.
Or, if you're planning a more bloody costume, the Spray Blood can come in handy.
Now, on to how I made the stockings!
Materials ~
- Light colored stockings or even knee-highs
- Several pieces of cardboard
- Halloween stencil in shape of choice
- Masking tape or double-sided tape
- Craft knife
- Simply Spray paint of choice
- Newspaper
Instructions ~
Step 1: Lay out newspaper as a work surface (preferably outdoors). Gently and carefully stretch the stocking over a narrow piece of cardboard (the piece I used was about 5" or so in width). You want the stocking to be slightly taught but not completely stretched out of shape.
Step 2: Place your stencil where you want the design to be. Use masking or double-sided tape to keep it in place.
Step 3: Using your craft knife, take another piece of cardboard and cut a hole in the center that is just barely larger than the design of the stencil. This is going to mask the rest of the stocking from being sprayed with the paint. Be sure the rest of the stocking is completely covered and masked off.
Step 4: Once you're sure that your stencil and cardboard "mask" are securely in place, prepare the paint for spraying. Please note: The first time I used the paint, I was surprised at the force with which it comes out. So, be careful! Follow the instructions on the can exactly, and begin spraying on your newspaper work surface before spraying your stenciled area.
Step 5: Now that the paint has been applied to the stenciled area, some of the paint may have beaded up on top of the stencil. You can take a Q-tip or tissue and gently blot off excess paint - just don't touch the stocking!
Step 6: If you feel you've removed all the excess paint, you can carefully remove the cardboard mask and/or stencil. I did this, however, you may want to let the stocking dry completely before attempting to remove it. The paint takes a full hour to dry.
Step 7: Once the design is completely dry, you can remove the cardboard from inside; or, you can prepare to stencil on another design.


Tips for unused paint: When the can is not in use, the blue trigger should be pushed out in the start/off position. It's best to store the can laying down or upside down in a cup of water. Before the next use, clear the nozzle of dried paint with a wet Q-tip.
--- This project was created by Erika Pitera, the managing editor and art director here at ZEST


Leave a comment